The Span
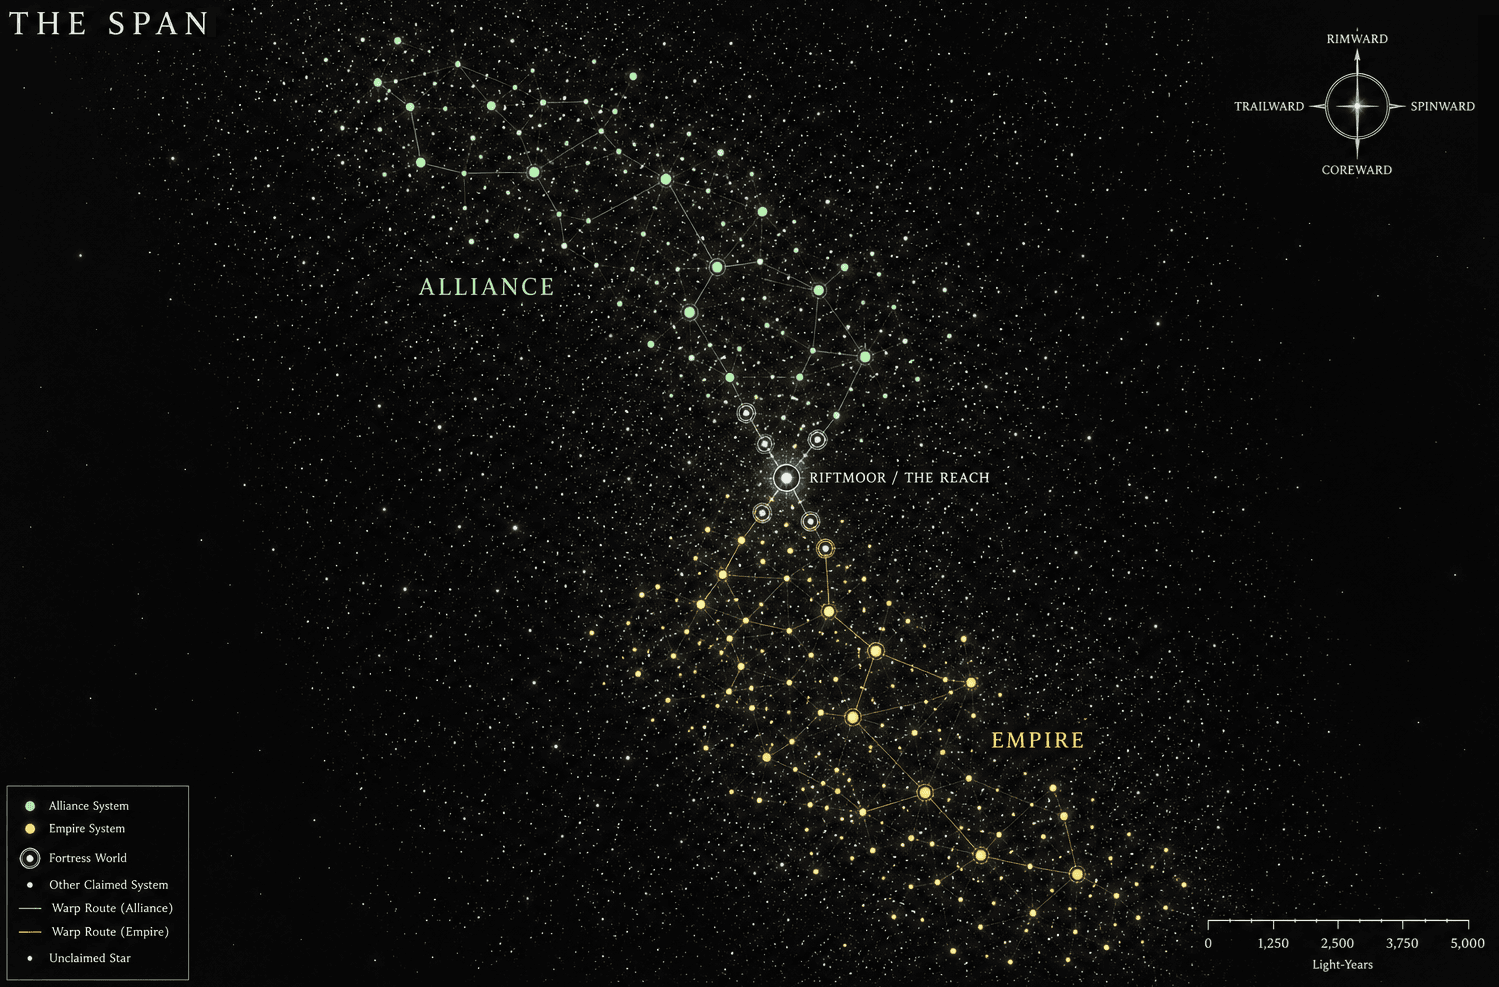 | 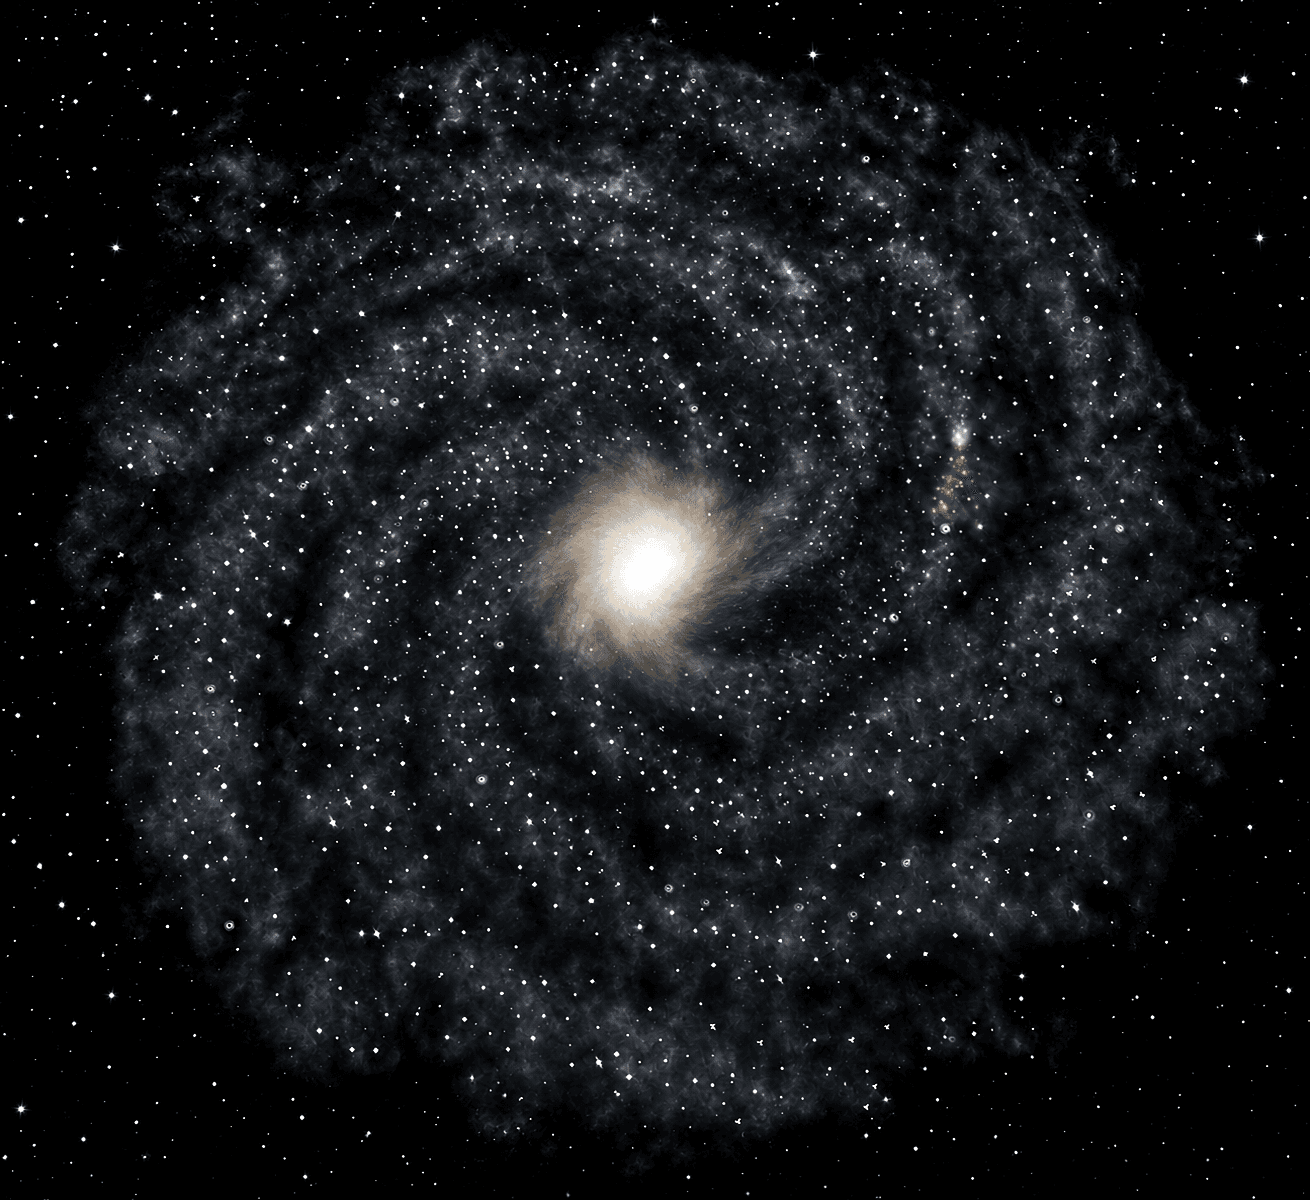 |
|---|
| System name | Number of stars | TRUE if S-group can support viable worlds | Spectral class; bold = viable light | Stellar arrangement: S/P/N/W | Primary bodies: planets, giants & belts | Moons and Major Belt Bodies | All bodies: P + S | Viable primary worlds | Viable secondary worlds | All viable worlds | Viable primary surface area | Viable secondary surface area | Total viable surface area | % of viable area by biome | % of all bodies by zone | Viable-world count by zone | % of viable area by zone | Radius range of viable worlds | Variation in viable-world radius; ↓ similar, ↑ diverse | Surface gravity range of viable worlds | Variation in viable-world gravity; ↓ similar, ↑ diverse | Body Biome(Secondary-Tertiary) Radius/Gravity/Zone | Body(Zone Type Moon#); R=Rocky, G=Giant, B=Belt | |||
|---|---|---|---|---|---|---|---|---|---|---|---|---|---|---|---|---|---|---|---|---|---|---|---|---|---|---|
| Code | # | League | Name | Star # | Viable S-Group | Stars | Arrange | Primary (P) | Secondary (S) | Total (T) | P-Viable | S-Viable | T-Viable | P-V-Area | S-V-Area | T-V-Area | Biomes | Zones (Z) | V-Zone | Area V/Z | Size Range | Size CV | Gravity Range | Gravity CV | Viable Worlds | System Order |
| A3g | 1 | A | Subsalian | 2 | TRUE | M + M | S-P1 | 14 | 27 | 41 | 3 | 1 | 4 | 1772.8 | 78.4 | 1851.2 | F-43% R-22% M-13% U-11% C-6% T-3% A-1% | 10% 5% 32% 54% | 2 2 | 78% 22% | 2.4k - 10.5k | 64% | 50% - 147% | 43% | D T(T-A) 2.4k/0.5g/3 G F(R-U) 10.5k/1.47g/3 L M(C-F) 5.1k/0.84g/4 J1 M(M-C) 2.5k/0.64g/4 | A(1R3) B(2R1) C(3R1) D(3R0) E(3R2) F(3R2) G(3R0) H(3B2) I(4R2) J(4B1) K(4G1) L(4R0) M(4R2) N(4G10) |
| A3f | 2 | A | Noctaudace | 2 | TRUE | K + M | S-P1 | 9 | 20 | 29 | 3 | 1 | 4 | 2070.6 | 59.3 | 2129.9 | S-29% O-26% R-25% G-9% M-5% U-3% C-2% | 3% 3% 14% 59% 21% | 2 2 | 81% 19% | 2.2k - 9k | 43% | 50% - 133% | 32% | C O(S-R) 9k/1.33g/3 D R(S) 7.5k/1.11g/3 H G(M-C) 5.3k/0.86g/4 F2 U 2.2k/0.5g/4 | A(1R0) B(2R0) C(3R0) D(3R2) E(4R1) F(4G7) G(4R3) H(4R2) I(5G5) |
| A3e | 3 | A | Neonebulrrhexis | 3 | TRUE | K + M + M | S-P1-P1 | 12 | 34 | 46 | 1 | 3 | 4 | 354.5 | 887.7 | 1242.1 | T-53% O-18% R-10% A-9% S-5% F-2% U-1% M-1% | 11% 15% 41% 33% | 1 2 1 | 29% 67% 4% | 2.1k - 5.8k | 33% | 50% - 85% | 20% | E T(T-A) 5.3k/0.72g/2 J1 O(R-A) 5.8k/0.85g/3 L1 F(U-M) 2.1k/0.5g/4 J2 T(T-S) 5.8k/0.85g/3 | A(1R1) B(1R2) C(2R2) D(2G2) E(2R0) F(3G0) G(3G1) H(3G1) I(3G10) J(3G2) K(4G10) L(4B3) |
| A3d | 4 | A | Milligelac Naja | 3 | TRUE | F + L + L | S-W-P2 | 10 | 23 | 33 | 3 | 2 | 5 | 1862.1 | 372.4 | 2234.5 | R-22% A-22% O-18% T-12% S-10% F-7% V-6% C-2% M-1% | 9% 15% 6% 36% 33% | 2 3 | 80% 20% | 2.5k - 8.5k | 49% | 60% - 128% | 34% | C A(O) 8.3k/1.12g/2 D R(T-V) 8.5k/1.28g/2 G F(S-M) 2.6k/0.63g/4 H2 S(F-C) 4.9k/0.6g/4 H4 S(F-C) 2.5k/0.63g/4 | A(1R0) B(1R1) C(2R1) D(2R1) E(2R0) F(3R1) G(4R1) H(4G9) I(5R2) J(5G7) |
| A3c | 5 | A | Geoargentian Morvaren | 2 | TRUE | G + M | S-P1 | 8 | 58 | 66 | 1 | 4 | 5 | 61.8 | 1334.9 | 1396.8 | M-29% F-25% S-18% R-14% O-7% T-7% | 6% 55% 33% 6% | 4 1 | 88% 12% | 2.2k - 6k | 31% | 55% - 92% | 19% | D R(O-S) 2.2k/0.55g/3 E1 S(F-M) 6k/0.92g/3 E3 M(F-M) 5.8k/0.81g/3 G4 T(O) 3.6k/0.62g/4 E5 R(F-M) 4.9k/0.87g/3 | A(1R3) B(3G18) C(3G8) D(3R0) E(3G6) F(4G14) G(4G6) H(5G3) |
| A3b | 6 | A* | Emcandform Alliance | 2 | TRUE | M + M | S-P1 | 10 | 26 | 36 | 2 | 4 | 6 | 812.5 | 755.8 | 1568.3 | T-38% R-27% A-12% S-10% D-6% F-6% O-1% | 11% 22% 50% 17% | 2 4 | 52% 48% | 2.6k - 7.1k | 40% | 50% - 104% | 25% | B D(R-F) 3.7k/0.71g/2 D R(A-S) 7.1k/0.99g/2 G1 T 5.9k/1.04g/3 H1 F(S-T) 3k/0.61g/3 H2 T(S-R) 2.6k/0.5g/3 G6 T(T-O) 3k/0.76g/3 | A(1R3) B(2R0) C(2G2) D(2R3) E(3R0) F(3R0) G(3G6) H(3G8) I(5R3) J(5G1) |
| A3a | 7 | A | Agriterrptosis | 2 | TRUE | K + M | S-P1 | 9 | 31 | 40 | 4 | 5 | 9 | 1191.7 | 816.9 | 2008.6 | S-33% C-13% M-13% G-10% U-8% O-8% F-7% D-6% T-1% | 15% 3% 83% | 1 1 7 | 39% 9% 52% | 2.3k - 7.9k | 46% | 50% - 123% | 30% | B S(S-D) 7.9k/1.23g/2 C O(O-T) 3.9k/0.68g/3 E G(G-C) 3.6k/0.69g/4 F M(F-M) 2.3k/0.5g/4 D1 C(F-M) 5k/0.84g/4 D2 U(M) 4.9k/0.72g/4 D5 C(M) 2.3k/0.58g/4 D6 C(G) 2.3k/0.6g/4 D7 F(G) 2.3k/0.5g/4 | A(2R2) B(2R2) C(3R0) D(4G9) E(4R1) F(4R2) G(4G0) H(4G13) I(4R2) |
| A2f | 8 | A | Tetrasentulum | 2 | TRUE | G + M | S-P1 | 9 | 10 | 19 | 3 | 2 | 5 | 1624.9 | 104.7 | 1729.6 | D-54% R-23% T-9% F-5% O-4% G-2% M-1% U-1% C-0% | 11% 5% 58% 26% | 1 2 2 | 76% 18% 6% | 2k - 10.2k | 72% | 50% - 136% | 44% | B D(R-D) 10.2k/1.36g/2 C T(O-D) 3.3k/0.56g/3 E F(T-O) 3.7k/0.78g/3 H1 T(M-G) 2.1k/0.5g/4 H2 G(U-C) 2k/0.52g/4 | A(1R1) B(2R0) C(3R2) D(3G0) E(3R1) F(3R3) G(3R0) H(4B2) I(4R1) |
| A2e | 9 | A | Prearchan | 1 | TRUE | K | S | 6 | 7 | 13 | 3 | 2 | 5 | 1684.6 | 136 | 1820.6 | O-36% A-19% F-11% V-10% D-6% T-5% C-3% U-3% G-3% S-2% M-2% R-1% | 8% 8% 15% 69% | 1 1 3 | 65% 8% 27% | 2k - 9.7k | 60% | 52% - 146% | 46% | B O(A-V) 9.7k/1.46g/2 D T(S-R) 3.4k/0.61g/3 E F(D-U) 5.3k/0.63g/4 F1 G(C) 2.6k/0.57g/4 F4 M(C) 2k/0.52g/4 | A(1R0) B(2R0) C(3R0) D(3R0) E(4R1) F(4G6) |
| A2d | 10 | A | Polyarborole Bloodhorn | 3 | TRUE | K + M + M | S-W-W | 9 | 13 | 22 | 3 | 1 | 4 | 1416.7 | 198.8 | 1615.5 | S-47% A-38% R-7% O-4% U-2% D-2% V-1% | 27% 5% 64% 5% | 3 1 | 88% 12% | 2.8k - 9.5k | 53% | 50% - 132% | 42% | A A(S-V) 2.8k/0.5g/2 B S(A-D) 3.8k/0.79g/2 D S(A) 9.5k/1.32g/2 F1 R(O-U) 4k/0.53g/4 | A(2R1) B(2R1) C(2G0) D(2R0) E(3G0) F(4G1) G(4G7) H(4B3) I(5G0) |
| A2c | 11 | A | Octaglacace | 1 | TRUE | K | S | 8 | 9 | 17 | 3 | 1 | 4 | 1446.9 | 192.7 | 1639.6 | A-72% T-14% S-8% M-3% F-3% | 29% 47% 24% | 2 2 | 84% 16% | 2.5k - 9.7k | 56% | 50% - 120% | 33% | A A 9.7k/1.2g/2 D S(M-T) 3.8k/0.87g/3 G F(T) 2.5k/0.5g/3 B1 T(T-S) 3.9k/0.63g/2 | A(2R2) B(2R1) C(3G1) D(3R1) E(3R0) F(3R0) G(3R1) H(4R3) |
| A2b | 12 | A | Heliastrcle | 2 | TRUE | G + M | S-P1 | 6 | 23 | 29 | 0 | 4 | 4 | 0 | 1050 | 1050 | R-28% T-22% M-17% S-14% O-8% F-8% U-4% | 3% 14% 21% 62% | 4 | 100% | 4.5k - 4.6k | 2% | 66% - 94% | 15% | D1 R(T-F) 4.6k/0.67g/3 D2 R(O-U) 4.6k/0.8g/3 D3 S(T-F) 4.5k/0.66g/3 D4 M(T-M) 4.5k/0.94g/3 | A(1R0) B(2G3) C(3R0) D(3G4) E(4G16) F(4G0) |
| A2a | 13 | A | Diaphonate | 1 | TRUE | G | S | 9 | 60 | 69 | 0 | 5 | 5 | 0 | 1204.4 | 1204.4 | V-27% A-23% F-18% R-9% T-7% M-7% S-6% O-2% | 4% 14% 59% 22% | 3 2 | 77% 23% | 3.1k - 5.9k | 26% | 50% - 78% | 16% | C1 V(A-T) 5.9k/0.78g/2 G2 S(F-R) 3.1k/0.5g/3 C3 F(A-R) 5.1k/0.64g/2 E5 M(R-O) 3.5k/0.56g/3 C6 V(A-T) 3.5k/0.58g/2 | A(1R1) B(1R0) C(2G8) D(2R0) E(3G19) F(3G13) G(3G3) H(3G2) I(5G14) |
| A1d | 14 | A | Pseudovirdynia | 2 | TRUE | A + K | S-P1 | 10 | 52 | 62 | 2 | 1 | 3 | 1229.8 | 200.8 | 1430.5 | V-30% R-24% S-19% U-14% M-13% | 5% 10% 13% 73% | 1 1 1 | 43% 43% 14% | 4k - 7k | 24% | 83% - 119% | 14% | A V(S-V) 7k/1.19g/2 C R(M-S) 7k/1.01g/3 F1 U 4k/0.83g/4 | A(2R0) B(2G1) C(3R2) D(3B2) E(4B4) F(4G1) G(4R0) H(5G5) I(5B6) J(5G31) |
| A1c | 15 | A | Exobrontrrhexis | 2 | TRUE | A + M | S-P1 | 6 | 35 | 41 | 1 | 3 | 4 | 778.9 | 256.7 | 1035.6 | S-53% R-26% M-13% O-3% D-2% T-2% A-1% F-1% | 7% 73% 20% | 2 1 1 | 82% 6% 13% | 2.2k - 7.9k | 60% | 57% - 108% | 27% | A S(R-S) 7.9k/1.08g/2 A1 R(D-A) 2.3k/0.59g/2 E2 M 3.2k/0.77g/4 B7 O(T-F) 2.2k/0.57g/3 | A(2R2) B(3G21) C(3G5) D(3R1) E(4G6) F(4G0) |
| A1b | 16 | A | Anabenesphere | 2 | TRUE | O + O | S-P1 | 9 | 14 | 23 | 2 | 2 | 4 | 848.4 | 200.1 | 1048.5 | G-31% D-23% O-18% M-12% C-7% F-6% U-3% | 4% 57% 39% | 1 3 | 41% 59% | 2.3k - 5.9k | 36% | 50% - 76% | 15% | A D(O) 5.9k/0.73g/3 E G(M-G) 5.8k/0.76g/4 B1 C(F-U) 3.2k/0.73g/4 D3 G(F-U) 2.3k/0.5g/4 | A(3R0) B(4G3) C(4G0) D(4G6) E(4R0) F(5R1) G(5G0) H(5G1) I(5G3) |
| A1a | 17 | A | Aaquium | 1 | TRUE | K | S | 12 | 27 | 39 | 3 | 2 | 5 | 1459.7 | 294.8 | 1754.5 | D-38% O-18% F-12% V-9% M-6% R-6% G-4% U-4% T-2% | 3% 13% 59% 13% 13% | 1 3 1 | 59% 37% 5% | 2.6k - 9k | 50% | 50% - 122% | 38% | B D(O-V) 9k/1.22g/2 G F(D-M) 5.3k/0.96g/3 J G(F-U) 2.6k/0.5g/4 F1 R(M-T) 3.9k/0.61g/3 F4 U(G-O) 2.9k/0.5g/3 | A(1R0) B(2R0) C(2R2) D(2R0) E(3R1) F(3G11) G(3R3) H(3R4) I(4R0) J(4R3) K(5G3) L(5R0) |
| AE | 18 | R | The Reach | 1 | TRUE | G | S | 9 | 40 | 49 | 4 | 7 | 11 | 2546.3 | 978.9 | 3525.2 | O-21% S-17% R-15% G-12% M-9% C-7% T-6% A-5% U-3% F-2% V-1% D-1% | 2% 8% 14% 67% 8% | 1 7 3 | 8% 76% 16% | 2.2k - 9.4k | 49% | 53% - 137% | 31% | B A(F-V) 4.8k/0.72g/2 C R(R-O) 7.1k/1.07g/3 C1 T(O) 2.8k/0.55g/3 D O(T-O) 6.4k/1g/3 D1 M(D-A) 2.5k/0.55g/3 D2 O 2.4k/0.61g/3 E S(G-O) 9.4k/1.37g/3 E1 G(M) 3.8k/0.87g/3 F1 M 3.1k/0.79g/4 H1 C(U-M) 5.4k/0.85g/4 H2 C 2.2k/0.53g/4 | A(1R0) B(3R2) C(4R1) D(4R1) E(4G2) F(4R0) G(4R1) H(4B4) I(4R0) |
| E1a | 19 | E | Aerocosmless | 2 | TRUE | M + M | S-P1 | 10 | 12 | 22 | 4 | 0 | 4 | 2055.2 | 0 | 2055.2 | U-41% F-19% G-10% O-9% M-7% T-5% C-3% V-3% R-3% A-1% | 32% 14% 55% | 1 1 2 | 9% 17% 74% | 3.8k - 10.2k | 44% | 57% - 117% | 25% | C T(V-A) 3.8k/0.8g/2 E O(M-R) 5.2k/0.91g/3 G U(F-G) 10.2k/1.17g/4 I U(C-M) 4.2k/0.57g/4 | A(2R0) B(2R4) C(2R0) D(3R1) E(3R0) F(4R0) G(4R1) H(4G0) I(4R1) J(4G5) |
| E1b | 20 | E | Archaeoferrola | 2 | TRUE | M + M | S-P1 | 11 | 34 | 45 | 3 | 0 | 3 | 2104.1 | 0 | 2104.1 | S-55% U-18% C-10% V-10% D-5% O-2% F-1% T-0% | 13% 49% 7% 31% | 1 1 1 | 64% 3% 33% | 2.3k - 10.4k | 50% | 50% - 131% | 36% | C S(S-V) 10.4k/1.31g/2 D O(F-T) 2.3k/0.5g/3 H U(C-D) 7.4k/1.2g/4 | A(2G1) B(2R0) C(2R2) D(3R1) E(3R0) F(3G18) G(4G0) H(4R1) I(5G0) J(5R3) K(5G8) |
| E1c | 21 | E | Infraalbon | 1 | TRUE | K | S | 7 | 7 | 14 | 3 | 0 | 3 | 2091.9 | 0 | 2091.9 | M-32% R-28% T-15% O-14% C-6% A-4% F-2% | 21% 21% 43% 7% 7% | 2 1 | 63% 37% | 4.4k - 9.2k | 28% | 65% - 130% | 27% | C R(T-O) 9.2k/1.3g/3 D O(A-F) 4.4k/0.65g/3 F M(M-C) 7.9k/1.09g/4 | A(1R2) B(2R2) C(3R2) D(3R1) E(3R0) F(4R0) G(5R0) |
| E2a | 22 | E | Amphieosiasis Azure Guard | 1 | TRUE | M | S | 4 | 1 | 5 | 1 | 0 | 1 | 1655.6 | 0 | 1655.6 | C-70% T-30% | 40% 60% | 1 | 100% | 11.5k - 11.5k | 0% | 150% - 150% | 0% | D C(T-C) 11.5k/1.5g/4 | A(3R0) B(3R0) C(4R0) D(4R1) |
| E2b | 23 | E | Demiinsuloid | 1 | TRUE | G | S | 10 | 10 | 20 | 3 | 1 | 4 | 1856.5 | 157.5 | 2014 | O-38% D-18% G-17% C-9% S-9% F-5% T-3% U-1% | 15% 5% 75% 5% | 1 3 | 60% 40% | 3.5k - 9.8k | 44% | 77% - 142% | 26% | B O(D-S) 9.8k/1.42g/2 D O(T-U) 3.7k/0.79g/4 I G(C-F) 6.1k/1.02g/4 H1 G(C-F) 3.5k/0.77g/4 | A(2R1) B(2R0) C(3R0) D(4R0) E(4G1) F(4R3) G(4R0) H(4G5) I(4R0) J(5G0) |
| E2c | 24 | E | Exaethent | 1 | TRUE | M | S | 7 | 23 | 30 | 3 | 1 | 4 | 2547.6 | 126.8 | 2674.4 | M-39% R-19% T-14% U-9% V-8% D-4% F-3% C-3% | 3% 3% 10% 83% | 1 3 | 26% 74% | 3.2k - 11.6k | 53% | 67% - 150% | 32% | B T(V-D) 7.5k/1.15g/3 C M(C-F) 3.5k/0.79g/4 D M(R-U) 11.6k/1.5g/4 D1 F(C-M) 3.2k/0.67g/4 | A(1R0) B(3R0) C(4R0) D(4R1) E(5R0) F(5G20) G(5R2) |
| E2d | 25 | E | Quasichronage | 4 | TRUE | M + M + M + M | S-P1-W-N | 7 | 11 | 18 | 1 | 0 | 1 | 1425 | 0 | 1425 | O-55% F-30% U-15% | 6% 39% 56% | 1 | 100% | 10.6k - 10.6k | 0% | 130% - 130% | 0% | D O(F-U) 10.6k/1.3g/3 | A(1R0) B(3R1) C(3R1) D(3R0) E(3B1) F(4G7) G(4G1) |
| E3a | 26 | E | Bithermule Fairbarrow | 1 | TRUE | G | S | 9 | 14 | 23 | 3 | 3 | 6 | 2264 | 835.2 | 3099.2 | S-33% U-16% A-15% M-13% R-10% C-7% D-3% O-2% T-2% | 13% 78% 9% | 1 4 1 | 5% 73% 23% | 3.2k - 10.6k | 44% | 67% - 121% | 20% | A S(S-D) 3.3k/0.75g/2 D S(A-M) 10.6k/1.21g/3 I U(C-U) 7.5k/0.99g/4 C1 M(R-O) 5.3k/0.78g/3 B2 D(A-R) 3.2k/0.67g/3 C2 R(S-T) 5.3k/0.91g/3 | A(2R2) B(3G3) C(3G6) D(3R0) E(3R3) F(3R0) G(3G0) H(4G0) I(4R0) |
| E3b | 27 | E | Ekspectery | 2 | TRUE | M + M | S-W | 6 | 7 | 13 | 1 | 1 | 2 | 1665.7 | 125.6 | 1791.3 | O-55% D-28% F-14% M-2% T-1% | 15% 15% 46% 23% | 2 | 100% | 3.2k - 11.5k | 57% | 71% - 150% | 36% | E O(D-F) 11.5k/1.5g/3 E1 O(M-T) 3.2k/0.71g/3 | A(1R1) B(2R0) C(2R0) D(3G2) E(3R2) F(5G2) |
| E3c | 28 | E | Orthomontless Haventide | 1 | TRUE | M | S | 8 | 5 | 13 | 4 | 0 | 4 | 3557.2 | 0 | 3557.2 | G-24% F-24% O-23% R-15% U-7% S-6% D-1% A-1% | 31% 15% 54% | 1 2 1 | 4% 52% 44% | 3.2k - 11.2k | 39% | 50% - 150% | 34% | C R(D-A) 3.2k/0.5g/2 D O(R-O) 9.6k/1.34g/3 E F(S-R) 7.4k/1.08g/3 H G(F-U) 11.2k/1.5g/4 | A(2R0) B(2R0) C(2R1) D(3R0) E(3R0) F(4G4) G(4R0) H(4R0) |
| E3d | 29 | E* | Orthoorbdynia Empire | 1 | TRUE | M | S | 6 | 6 | 12 | 2 | 0 | 2 | 1529.5 | 0 | 1529.5 | T-54% O-29% S-17% | 8% 42% 50% | 2 | 100% | 2.5k - 10.7k | 62% | 59% - 137% | 40% | C S(T-O) 2.5k/0.59g/3 D T(O-S) 10.7k/1.37g/3 | A(1R0) B(3R0) C(3R2) D(3R0) E(4G2) F(4R2) |
| E3e | 30 | E | Vicecaelory Lekaris | 1 | TRUE | M | S | 5 | 3 | 8 | 4 | 0 | 4 | 2892.3 | 0 | 2892.3 | S-38% V-28% T-24% A-5% R-3% G-1% C-0% | 13% 25% 38% 25% | 1 2 1 | 33% 65% 2% | 2.2k - 10.3k | 44% | 53% - 121% | 27% | A V(V-A) 8.7k/1.03g/2 B T(S-R) 6.6k/0.96g/3 C S(T-S) 10.3k/1.21g/3 D G(R-C) 2.2k/0.53g/4 | A(2R0) B(3R0) C(3R0) D(4R2) E(5R1) |
| Code | # | League | Name | Stars | Arrange | Total (T) | P-Viable | S-Viable | T-Viable | T-V-Area |
|---|---|---|---|---|---|---|---|---|---|---|
| A3g | 1 | A | Subsalian | M + M | S-P1 | 41 | 3 | 1 | 4 | 1851.2 |
| A3f | 2 | A | Noctaudace | K + M | S-P1 | 29 | 3 | 1 | 4 | 2129.9 |
| A3e | 3 | A | Neonebulrrhexis | K + M + M | S-P1-P1 | 46 | 1 | 3 | 4 | 1242.1 |
| A3d | 4 | A | Milligelac Naja | F + L + L | S-W-P2 | 33 | 3 | 2 | 5 | 2234.5 |
| A3c | 5 | A | Geoargentian Morvaren | G + M | S-P1 | 66 | 1 | 4 | 5 | 1396.8 |
| A3b | 6 | A* | Emcandform Alliance | M + M | S-P1 | 36 | 2 | 4 | 6 | 1568.3 |
| A3a | 7 | A | Agriterrptosis | K + M | S-P1 | 40 | 4 | 5 | 9 | 2008.6 |
| A2f | 8 | A | Tetrasentulum | G + M | S-P1 | 19 | 3 | 2 | 5 | 1729.6 |
| A2e | 9 | A | Prearchan | K | S | 13 | 3 | 2 | 5 | 1820.6 |
| A2d | 10 | A | Polyarborole Bloodhorn | K + M + M | S-W-W | 22 | 3 | 1 | 4 | 1615.5 |
| A2c | 11 | A | Octaglacace | K | S | 17 | 3 | 1 | 4 | 1639.6 |
| A2b | 12 | A | Heliastrcle | G + M | S-P1 | 29 | 0 | 4 | 4 | 1050 |
| A2a | 13 | A | Diaphonate | G | S | 69 | 0 | 5 | 5 | 1204.4 |
| A1d | 14 | A | Pseudovirdynia | A + K | S-P1 | 62 | 2 | 1 | 3 | 1430.5 |
| A1c | 15 | A | Exobrontrrhexis | A + M | S-P1 | 41 | 1 | 3 | 4 | 1035.6 |
| A1b | 16 | A | Anabenesphere | O + O | S-P1 | 23 | 2 | 2 | 4 | 1048.5 |
| A1a | 17 | A | Aaquium | K | S | 39 | 3 | 2 | 5 | 1754.5 |
| 18 | R | The Reach | G | S | 49 | 4 | 7 | 11 | 3525.2 | |
| E1a | 19 | E | Aerocosmless | M + M | S-P1 | 22 | 4 | 0 | 4 | 2055.2 |
| E1b | 20 | E | Archaeoferrola | M + M | S-P1 | 45 | 3 | 0 | 3 | 2104.1 |
| E1c | 21 | E | Infraalbon | K | S | 14 | 3 | 0 | 3 | 2091.9 |
| E2a | 22 | E | Amphieosiasis Azure Guard | M | S | 5 | 1 | 0 | 1 | 1655.6 |
| E2b | 23 | E | Demiinsuloid | G | S | 20 | 3 | 1 | 4 | 2014 |
| E2c | 24 | E | Exaethent | M | S | 30 | 3 | 1 | 4 | 2674.4 |
| E2d | 25 | E | Quasichronage | M + M + M + M | S-P1-W-N | 18 | 1 | 0 | 1 | 1425 |
| E3a | 26 | E | Bithermule Fairbarrow | G | S | 23 | 3 | 3 | 6 | 3099.2 |
| E3b | 27 | E | Ekspectery | M + M | S-W | 13 | 1 | 1 | 2 | 1791.3 |
| E3c | 28 | E | Orthomontless Haventide | M | S | 13 | 4 | 0 | 4 | 3557.2 |
| E3d | 29 | E* | Orthoorbdynia Empire | M | S | 12 | 2 | 0 | 2 | 1529.5 |
| E3e | 30 | E | Vicecaelory Lekaris | M | S | 8 | 4 | 0 | 4 | 2892.3 |
| Revised Alliance | Empire | |
|---|---|---|
| Systems | 17 | 12 |
| Viable planets | 37 | 32 |
| Viable secondaries | 43 | 6 |
| Viable worlds | 80 | 38 |
| Viable area | 26,760.2m | 26,889.7m |
| Area share | 49.88% | 50.12% |
| Biome | Total in 29 | % of Span viable area | Alliance controls | Empire controls |
|---|---|---|---|---|
| Savanna | 7,862m km² | 14.70% | 50.10% | 49.90% |
| Ocean | 7,256m km² | 13.50% | 39.90% | 60.10% |
| Tropical | 5,911m km² | 11.00% | 64.90% | 35.10% |
| Temperate | 5,504m km² | 10.30% | 46.30% | 53.70% |
| Fungal | 4,648m km² | 8.70% | 53.70% | 46.30% |
| Mountain | 4,264m km² | 7.90% | 46.20% | 53.80% |
| Arid | 3,977m km² | 7.40% | 81.30% | 18.70% |
| Desert | 3,438m km² | 6.40% | 65.00% | 35.00% |
| Tundra | 3,317m km² | 6.20% | 26.90% | 73.10% |
| Arctic | 2,621m km² | 4.90% | 22.60% | 77.40% |
| Volcanic | 2,551m km² | 4.80% | 48.90% | 51.10% |
| Taiga | 2,302m km² | 4.30% | 38.30% | 61.70% |
| TOTAL | 53,650m km² | 100% | 49.90% | 50.10% |
| Biome | Primary | Secondary | Tertiary | All Slots |
|---|---|---|---|---|
| Volcanic | 4 | 3 | 6 | 13 |
| Arid | 3 | 11 | 9 | 23 |
| Desert | 5 | 6 | 7 | 18 |
| Savanna | 15 | 14 | 10 | 39 |
| Tropical | 14 | 18 | 11 | 43 |
| Temperate | 15 | 18 | 11 | 44 |
| Ocean | 14 | 10 | 11 | 35 |
| Fungal | 12 | 15 | 10 | 37 |
| Mountain | 12 | 13 | 15 | 40 |
| Taiga | 11 | 4 | 5 | 20 |
| Tundra | 8 | 4 | 14 | 26 |
| Arctic | 5 | 10 | 11 | 26 |
| TOTAL | 118 | 118 | 118 | 354 |
| Zone | Alliance Systems | Empire Systems | Total Systems | Viable Planets | Viable Secondaries | Viable Worlds |
|---|---|---|---|---|---|---|
| Zone 1 | 4 | 3 | 7 | 18 | 8 | 26 |
| Zone 2 | 6 | 4 | 10 | 20 | 17 | 37 |
| Zone 3 | 7 | 5 | 12 | 31 | 24 | 55 |
| Total | 17 | 12 | 29 | 69 | 49 | 118 |
| League / Zone | Systems | Stars | Primary Bodies | Secondary Bodies | Total Bodies | Viable Planets | Viable Secondaries | Viable Worlds |
|---|---|---|---|---|---|---|---|---|
| A1 | 4 | 7 | 37 | 128 | 165 | 8 | 8 | 16 |
| A2 | 6 | 8 | 47 | 122 | 169 | 12 | 15 | 27 |
| A3 | 7 | 14 | 72 | 219 | 291 | 17 | 20 | 37 |
| E1 | 3 | 5 | 28 | 53 | 81 | 10 | 0 | 10 |
| E2 | 4 | 7 | 28 | 45 | 73 | 8 | 2 | 10 |
| E3 | 5 | 5 | 34 | 35 | 69 | 14 | 4 | 18 |
| Total | 29 | 46 | 246 | 602 | 848 | 69 | 49 | 118 |
| Statistic | Alliance | Empire | Major Span |
|---|---|---|---|
| Major Systems | 17 | 12 | 29 |
| Stars | 29 | 17 | 46 |
| Primary Bodies | 156 | 90 | 246 |
| Secondary Bodies | 469 | 133 | 602 |
| All Major Bodies | 625 | 223 | 848 |
| Viable Planets | 37 | 32 | 69 |
| Viable Secondaries | 43 | 6 | 49 |
| Total Viable Worlds | 80 | 38 | 118 |
| Viable Surface Area | 26,760.2m km² | 26,889.7m km² | 53,649.9m km² |
| Share of Viable Area | 49.88% | 50.12% | 100% |
| Metric | Major Span |
|---|---|
| Average stars/system | 1.59 |
| Average major bodies/system | 29.2 |
| Average viable worlds/system | 4.07 |
| Viable bodies as % of all bodies | 13.90% |
| Average viable area/system | ~1.85 billion km² |
| Total viable area in Riftmoor/Earth equivalents | ~105 Riftmoors |
The Span
The Span was the region of the Riftmoor Arm's Middle Zone settled by the Wardens during the latter Second Age. It comprised approximately 150 star systems, each containing at least one world successfully terraformed by the Wardens. Most remained comparatively minor colonies, sanctuaries, resource worlds, or isolated settlements, while roughly thirty systems developed into major population centers, foremost among them Riftmoor and its home system, the Reach.
The Span represented the maximum extent of Warden civilization before the Vanishing. Its worlds were scattered rather than continuously occupied, with enormous stretches of unsettled space lying between its inhabited systems.
Knowledge of the Span survived into the Third Age, particularly among the earliest generations who still remembered Warden rule and interstellar travel. As the worlds remained isolated for millennia, however, knowledge became fragmented into histories, legends, religious traditions, and disputed accounts.
The Fourth Age began with mortal interstellar spaceflight and the physical reconnection of the Span. Its old worlds became reachable again, while explorers simultaneously began traveling beyond its ancient boundaries into regions of the galaxy the Wardens themselves had never settled.
That gives the ages a particularly clean spatial progression:
Second Age: the Wardens created the Span.
Third Age: the Span became 150 isolated worlds.
Fourth Age: mortals reconnected the Span and went beyond it.
And I like the distinction between the Reach and Riftmoor here. Riftmoor was the homeworld and greatest historical/political center; the Reach was one of the thirty major systems, containing Riftmoor and its neighboring terraformed worlds. That will matter enormously once Fourth Age people start thinking on the scale of systems rather than individual planets.
The Span — Current Scale and Structure
By the end of the Second Age, civilization has spread from the Reach into roughly 150 inhabited star systems, collectively forming the Span. These systems were not equally developed. Some contain extensively terraformed and heavily populated worlds, while others supported little more than a single viable colony on a planet or moon.
Most of the ~150 systems did not see extensive development. On an interstellar scale, they functioned much like the villages and minor settlements of an earlier age: they establish the size and continuity of civilization without each becoming a major setting. Roughly 30 systems are significant enough to warrant individual development.
Why the Thirty became important
The Thirty were not selected because every system needed a special economic or political role. They were primarily the best systems the Wardens encountered within the Span.
Suitable systems should be distributed relatively evenly through the region. Some simply offered much better starting conditions than others: multiple promising worlds, easier terraforming, better resources, useful planetary arrangements, or other advantages. The Wardens concentrated their efforts there, settlement followed, and these naturally became the Span's major population centers.
Most of the Thirty will therefore be large, developed systems containing populations across several worlds. A minority can instead be important because their location, resources, infrastructure, or strategic value outweighs their population.
This provides a useful rule for development:
Suitability made most major systems important first; history determined what kind of important they eventually became.
Navigating the Span
Although the galaxy has meaningful vertical thickness, political and navigational maps of the Span can usually be treated as primarily two-dimensional.
The useful galactic directions are:
Coreward — toward the galactic center.
Rimward — away from the galactic center.
Spinward — in the direction of galactic rotation.
Trailing — opposite galactic rotation.
A system can therefore be located approximately by its distance from the galactic center and its angular position around it, with height above or below the galactic plane becoming important only when necessary.
This gives the Span comprehensible geography without pretending space is literally flat.
Alliance and Empire
The Reach remains the focal system of the Span, and the old political division within it provides the model for the larger interstellar division.
Within the Reach:
Inner/hot worlds → Alliance
Outer/cold worlds → Empire
Temperature obviously cannot continue to define allegiance across unrelated star systems. Instead, the same inward/outward orientation is projected onto the galactic map:
Coreward Span → Alliance
Rimward Span → Empire
Both powers can expand spinward and trailing, producing a long and irregular frontier rather than two civilizations simply moving away from one another.
The boundary need not be geometrically clean. Settlement history, wars, especially valuable systems, and changing claims can leave Imperial systems protruding coreward and Alliance systems rimward. Major systems near the central dividing region naturally become some of the most contested locations in the Span.
The Reach remains exceptional
Other systems can eventually rival or even exceed parts of the Reach in population, wealth, industry, or military importance, but the Reach remains politically unique.
Riftmoor is the ancestral center of civilization and the focus of claims to the Throne. Possession of it therefore carries legitimacy that cannot simply be reproduced by building a larger capital elsewhere.
It also remains uniquely connected to Rift-crystal creation. Rift crystals can subsequently be charged elsewhere, but their origin keeps the Reach materially important in addition to its historical and political significance.
Consequently, neither Alliance nor Empire can simply abandon the Reach even after their civilizations become truly interstellar.
Warden Sanctuaries at interstellar scale
The meaning of a Warden Sanctuary changes dramatically as civilization expands.
The great Riftmoor Sanctuaries remain the ancestral homes of the Warden families and retain enormous religious, cultural, and historical significance. During earlier periods, their mountains, forests, depths, storms, oceans, volcanoes, and engineered defenses could genuinely protect the small Warden families.
Interstellar warfare changes that.
As wars around Riftmoor and eventually throughout the Reach become increasingly destructive, keeping an entire immortal family in a famous location becomes untenable. Warden security therefore develops approximately as:
ancestral Riftmoor Sanctuary → remote continental retreats → off-world refuges → secret extrasolar refuges.
By the mature Second Age, a family's ancestral Sanctuary need not be where its Wardens actually live during dangerous periods.
Their true refuges may be extraordinarily remote and known only to the Wardens themselves and a tiny number of trusted people. Even their allied governments need not know their exact locations. Some refuges could lie among the ~120 otherwise minor inhabited systems—or somewhere even less conspicuous—rather than among the Thirty.
This separates two kinds of geography:
The public Span consists of its major systems, colonies, borders, capitals, routes, and ancestral Warden sites.
The hidden Warden geography consists of refuges, emergency retreats, abandoned sanctuaries, and other locations deliberately excluded from ordinary political knowledge.
That gives Second Age warfare considerably more freedom. Riftmoor can fall. The Alliance can occupy it for a period. An ancestral Sanctuary can be captured or destroyed. The Reach itself can change hands without implying that the associated Warden families were exterminated.
And this makes the eventual Wardens' Vanishing even stranger rather than explaining it away. Wardens disappearing from secluded refuges might initially be mistaken for another withdrawal—but some Wardens famously vanished in plain sight, turning to dust in the middle of whatever they were doing. Those witnessed disappearances establish that this was not merely the families retreating somewhere mortals could not find them.
The Span therefore gives the Second Age a much larger stage without diminishing Riftmoor: Riftmoor remains the center everyone came from and continues fighting over, while the actual civilization—and the places its immortal rulers hide—has grown far beyond it.
Strategic Zones, System Hierarchy, & Warden Sanctuaries
The Span extended roughly 12,000 light-years from end to end, with the Alliance and Empire each possessing approximately 6,000 light-years of strategic depth from the contested Reach. Each side was divided informally into three 2,000-light-year zones. Zone 1 contained the front lines and principal fortress systems; Zone 2 formed the developed middle territory; and Zone 3 occupied the broad, comparatively secure rear. Settlement widened away from the Reach, producing two irregular droplet-shaped regions joined at their narrow ends and giving the Span its characteristic bent-hourglass shape.
At its height, the Span contained approximately 150 Warden-settled systems, divided unevenly between the two powers, with roughly thirty considered Major Systems. These were the great population, political, industrial, religious, and military centers of the Second Age. Their worlds supported enormous Heir populations and the principal Warden Sanctuaries, while fortress systems concentrated Star-Arks and other forces capable of responding rapidly to invasion.
The remaining systems served less prominent but essential roles. Village Systems were generally well-terraformed agricultural worlds supporting the enormous populations of the major systems. Usually only a handful of Wardens resided in each, overseeing largely Heir-run societies and the movement of interstellar goods. Agricultural products were gathered at central locations, launched between systems by Wardens, received by other Wardens, and accompanied by Heir administrators through successive stages until reaching their destination. These worlds consequently developed substantial local societies despite remaining small by interstellar standards.
Outpost Systems formed an irregular defensive shell around the settled droplets. They were low-population, often imperfectly terraformed worlds that had been claimed but not yet extensively developed, with some intended to become future Village systems. Their principal purpose was surveillance. Resident Wardens continually scanned their systems for hostile warp arrivals while maintaining telepathic contact through a chain of neighboring Wardens and military commanders. An enemy attempting to bypass the obvious fortress line therefore risked appearing within this watcher network before reaching the valuable interior. Once detected, quick-reaction fleets could warp outward from Major and Fortress systems to intercept the intrusion.
Second-Age interstellar civilization consequently depended upon the Wardens themselves rather than sophisticated technology. At its height, the Span contained trillions of Heirs but only around a thousand Wardens, still fewer than had existed before the Great Siege. Wardens provided the long-distance transportation, communication, surveillance, and strategic mobility that allowed otherwise comparatively primitive societies to function across thousands of light-years.
This contradiction was especially apparent in warfare. Star-Arks were enormous magical warships built by civilizations that had reached the stars without first becoming technologically modern. Enchanted cannon exchanged fire across space while magical projections displayed the battlefield to commanders. Wardens could leave their vessels to attack enemy Arks directly, while boarding parties of battlemages, Paladins, and ordinary soldiers fought through breached compartments.
For the average Heir soldier, space combat was exceptionally dangerous. Life support depended upon enchantments, Rift crystals, pressure seals, and comparatively primitive suits rather than mature technological systems. A damaged enchanted door could expose an entire compartment to vacuum; a broken crystal or failed suit enchantment could eliminate a soldier's air supply; and boarding actions deliberately breached the very wards and seals keeping both crews alive. Much of a battle could therefore resemble medieval close combat conducted inside a fragile pressurized structure surrounded by vacuum, while immensely powerful Wardens tore through ships outside. The result was a uniquely brutal form of warfare: an interstellar civilization whose magical capabilities had advanced far beyond the mundane technology required to make spaceflight safe.
Terraforming Beyond the Reach
The Reach contains an unusually high concentration of terraformed worlds despite being more difficult to terraform than most ordinary star systems. This is a consequence of history rather than favorable conditions.
During the First Age, the Wardens possessed no means of interstellar travel. The planets of the Reach were therefore the only worlds available to them, and the enormous effort required to establish stable atmospheres, oceans, climates, and ecosystems was preferable to leaving otherwise usable planets barren. Worlds that would later have been rejected as poor terraforming candidates were extensively modified simply because there were no alternatives.
The development of warp travel inverted this calculation. A Warden could now abandon a difficult planet in favor of a more suitable world in another system. Terraforming remained extraordinarily powerful, but the limiting factor became the time and effort required to produce a stable result. This became particularly important during the Second Age, when much of the Span was contested and newly settled systems could become war zones with little warning.
As a result, later Warden expansion was selective. Favorable planets were transformed first, while difficult worlds—even those occupying otherwise ideal stellar zones—were often left barren, frozen, volcanic, or otherwise uninhabitable.
The Reach therefore possesses more terraformed worlds not because it was easier to terraform, but because, for much of history, it was the only system.
150 inhabited star systems exist, but almost everybody lives in the Thirty.
The villages feed them.
The outposts guard them.
The Major Systems are civilization.
Major and Village Worlds
The distinction between Major and Village settlement originally described systems more than individual worlds. Many early Major Systems contained lightly populated agricultural, resource, or wilderness worlds that functioned much like Village colonies alongside their principal population centers. As the Span expanded, however, numerous smaller systems naturally specialized in agriculture and resource production. Improved Warden transport allowed the great population centers to increasingly outsource their rural functions to these surrounding settlements. Former agricultural worlds within Major Systems consequently evolved into enormous receiving, processing, storage, and distribution centers, funneling goods from dozens of Village worlds toward their increasingly urbanized neighbors. Thus, the later distinction between Major and Village systems emerged gradually from settlement patterns rather than from any deliberate Warden classification.
The rest of the Span
Zone 1: the oldest colonies become the frontier again without ever moving. They were originally the leading edge of expansion; once settlement pushed outward, they became the rear-facing defensive wall protecting everything built beyond them.
For the lesser systems, we have a useful hard constraint: approximately 150 settled systems total, of which 29 are generated Majors plus the Reach. That leaves roughly 120 non-Major systems.
I would divide those 67 Alliance / 53 Empire. Combined with the Majors, that produces 84 Alliance systems, 65 Empire systems, and the Reach = 150. That's a noticeable Alliance-wide bias without making the Empire feel territorially tiny.
| Zone | Alliance Minor Systems | Empire Minor Systems |
|---|---|---|
| Zone 1 | 18 | 15 |
| Zone 2 | 22 | 17 |
| Zone 3 | 27 | 21 |
| Total | 67 | 53 |
Zone 1 — Major and Minor Systems
Zone 1 contained the oldest settlements beyond the Reach, originally forming the frontier from which both Leagues expanded. As settlement pushed outward, their position reversed: former frontier Majors became heavily fortified military centers, while many surrounding Villages, resource colonies, and waystations were converted into Outposts, fleet anchorages, and fortified supply worlds. Together they formed the defensive inner wall protecting each League's rear approaches. The Alliance maintained 4 Major and 18 Minor systems, containing 10 Major and approximately 23 Minor-system habitable worlds; the Empire maintained 3 Major and 15 Minor systems, containing 9 Major and approximately 19 Minor-system habitable worlds.
Zone 2 — Major and Lesser Systems
Zone 2 formed much of the Span's mature economic and logistical heartland. Its Major Systems developed established cities, Sanctuaries, industry, and distribution networks, while surrounding Village systems increasingly specialized in agriculture, timber, minerals, and other resources. This specialization allowed formerly rural worlds within the Majors to become increasingly urbanized or serve as processing and distribution centers. The Alliance maintained 6 Major and 22 Minor systems, containing 20 Major and approximately 29 Minor-system habitable worlds; the Empire maintained 4 Major and 17 Minor systems, containing 12 Major and approximately 22 Minor-system habitable worlds.
Zone 3 — Major and Lesser Systems
Zone 3 contained the broadest, safest, and youngest regions of Second-Age settlement. Its Major Systems became the principal destinations for civilian growth, culture, government, and great Warden institutions, with several eventually replacing older systems as practical centers of League and factional administration. Their surrounding lesser systems ranged from prosperous Villages to comparatively young colonies still developing when the Wardens vanished. The Alliance maintained 7 Major and 27 Minor systems, containing 25 Major and approximately 36 Minor-system habitable worlds; the Empire maintained 5 Major and 21 Minor systems, containing 22 Major and approximately 27 Minor-system habitable worlds.
